B. How to set the Unbreakable Identity (UbID) to a web application
1. General Information
1.1 What is UbID?
UbID IdP is a software application developed by Paradigma. Its main objective is to facilitate the enrollment and proof of identity of an individual, as well as recurring digital authentication. It is designed to easily integrate with other software applications using the OpenID Connect standard.
1.2 Who can integrate UbID?
UbID is available to be integrated at no initial cost into the web and mobile platforms and applications of any application that requires it to be incorporated.
1.3 Overview
Web applications using UbID are managed under a domain (by default ubid.app), and each application must generate a private cryptographic key that identifies it internally, and another public key that is shared with the web application to which the unbreakable identity service is provided. UbID additionally ensures that the public key is cryptographically stored in the decentralized identity document (DID) to avoid potential key spoofing. Other services are also provided to customize the display of the interface that end users will ultimately see and use to use the web application. This web application must integrate the development of a link or button, which when authenticated the user is redirected to the API location where a system interacts with a web API. From there, the OpenID Connect protocol comes in to interact to keep a web client session open.
Translated with www.DeepL.com/Translator (free version)
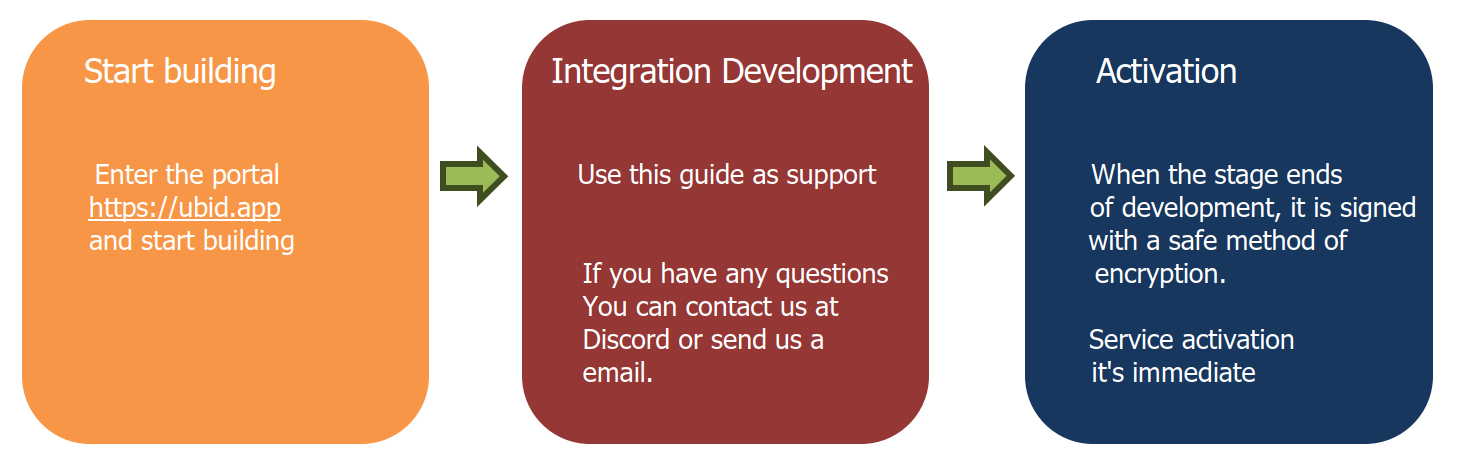
2. Start integration with UBiD
2.1 General scheme
The process is the following:
2.2 How is UBiD integrated into my applications?
To start the integration, you must click on the “Add the unbreakable digital identity to your login with UbID” button, or also with the “Start with construction” buttons on our web portal https://ubid.app.

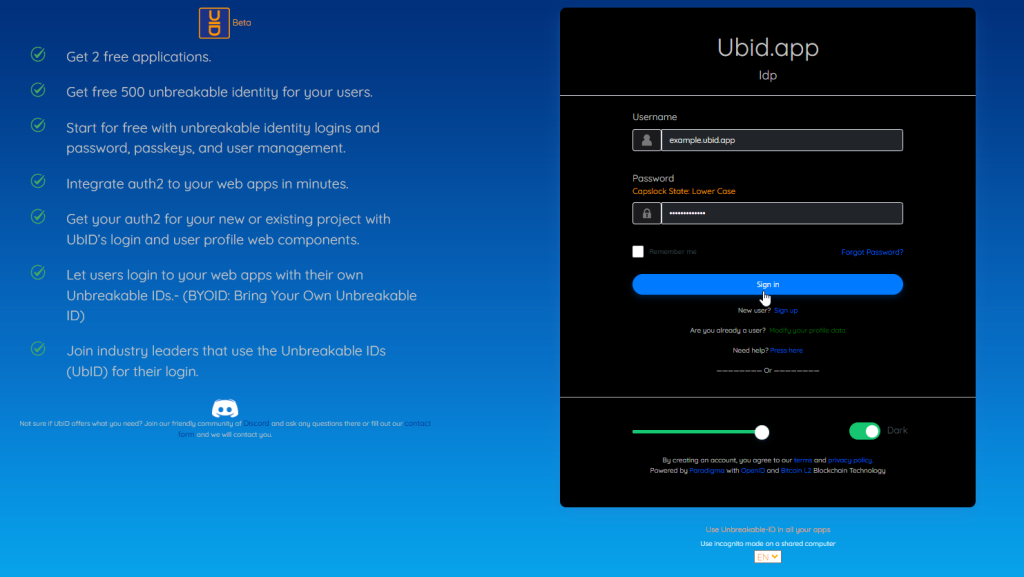
2.3 Access with user ID and password
You must log in with your user ID that is formatted with ubid.app domain and your password (see article “How to open an account”), and press the “Sign in” button.
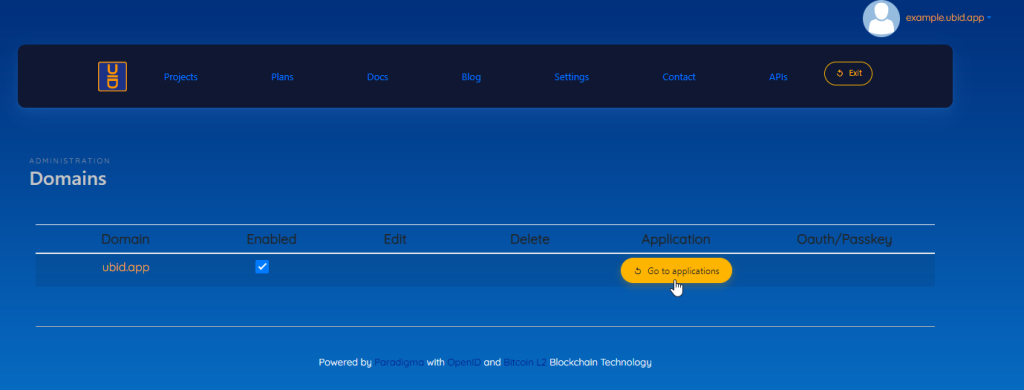
3. Domain Administration
3.1 Domain administration screen
Once you have accessed the UbID administration area, you can see the name and avatar of the connected user at the top right. Below is a menu with the available options, among which domain administration stands out. The UBID.APP domain is displayed by default
UbID uses the OpenID Connect standard, which in turn is based on the OAuth2.0 protocol.The authentication process is carried out through the exchange of tokens between the UbID service and the integrating application.
It should be noted that the initial BASIC plan allows you to add 2 applications under the UBID.APP domain and 500 registered users for free. The PRO plan allows other benefits and more users, and has an associated cost. The PREMIUM plan allows unlimited domains and applications, and unlimited registered users and has a higher associated cost.
To create our first application the user must click on the “Go to applications” button
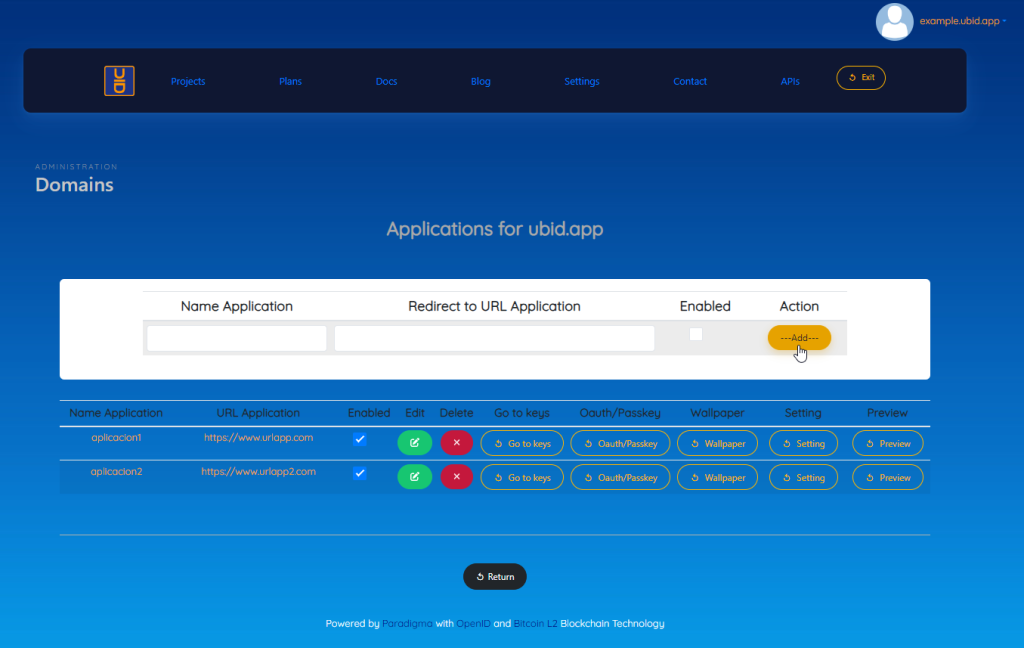
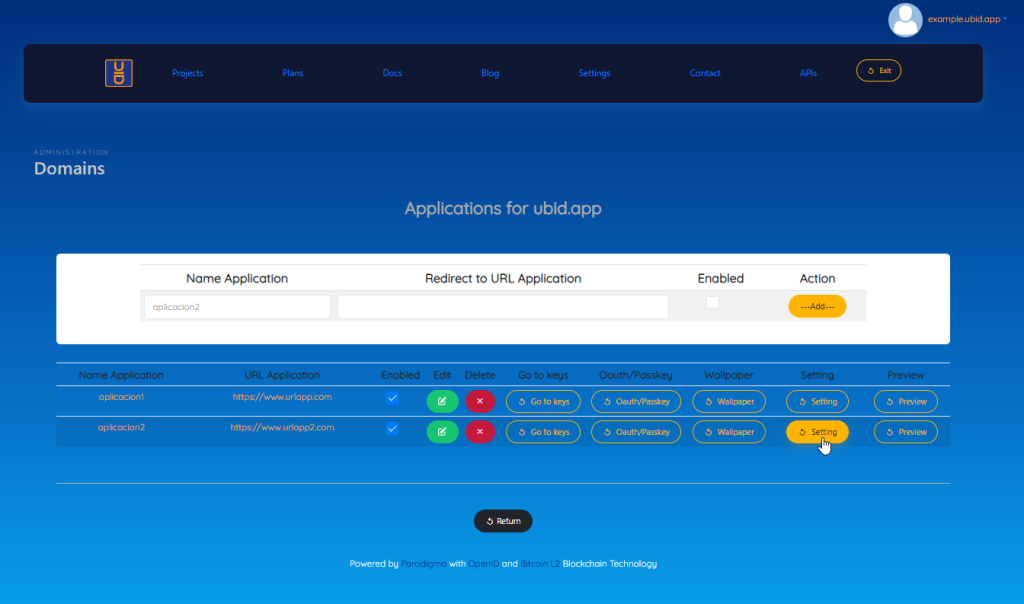
3.2 Application management screen
To create our first application we must add the following:
Application Name: Corresponds to what appears in the UbID login form, and must clearly identify the institution and the integrated platform. This name must be unique, so it is suggested to use the domain name of the application. Example: example.ubid.app
Application URL (Redirect): Also known as “callback”, it is the URL or endpoint belonging to the integrating application
to which UbID will redirect after a user has successfully authenticated.
Enabled/Disabled: Allows you to block or unblock access to the integrator application using UbID.
And press the “Add” button
Once the application has been added, we will have four buttons at our disposal that allow us to customize the application. The customization buttons are:
- Change or customize the login wallpaper
- Add Passkey option (passwordless) to login
- Extra configurations
- Encrypted key to access the application login
- Preview
Each of these options are detailed below.
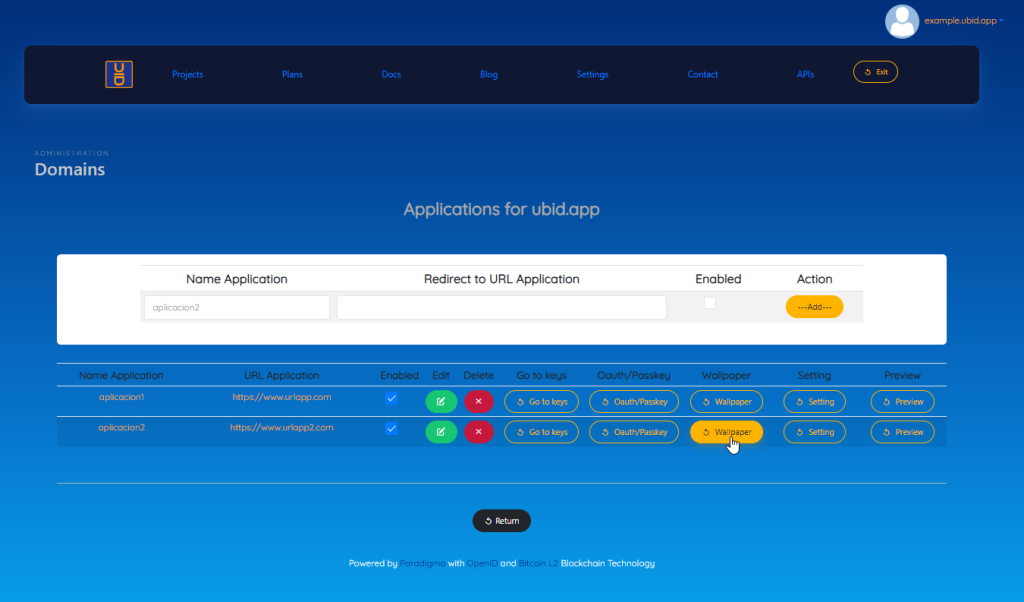
3.3 Customize the UbID login wallpaper
To customize the wallpaper you just have to click on the “Wallpaper” button, as shown in the following image.
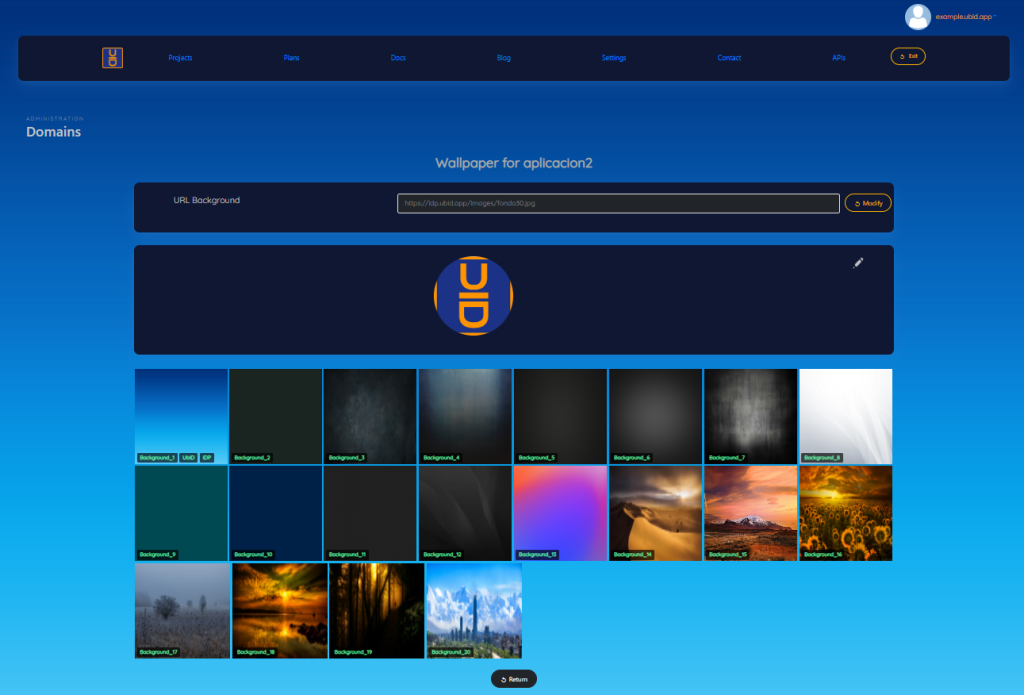
A screen containing 20 predetermined backgrounds is displayed; you can choose any of the ones shown by clicking on one of them.
Alternatively you can upload a background image by clicking on the pencil image, then upload an image.
You can also type a URL from an external site, in the entry labeled “Wallpaper URL”, and then click the “Modify” button
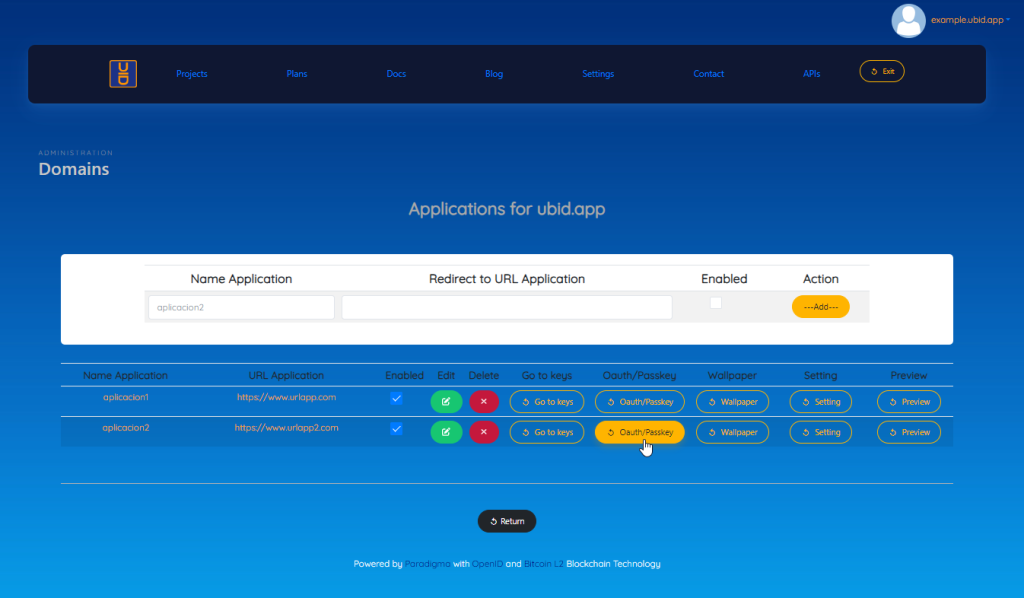
3.4 Customize the Passkey (passwordless) to the UbID login
To customize the Passkey (passwordless) to login to our new application, you just have to click on the “Oauth/Passkey” button, as shown in the following image.
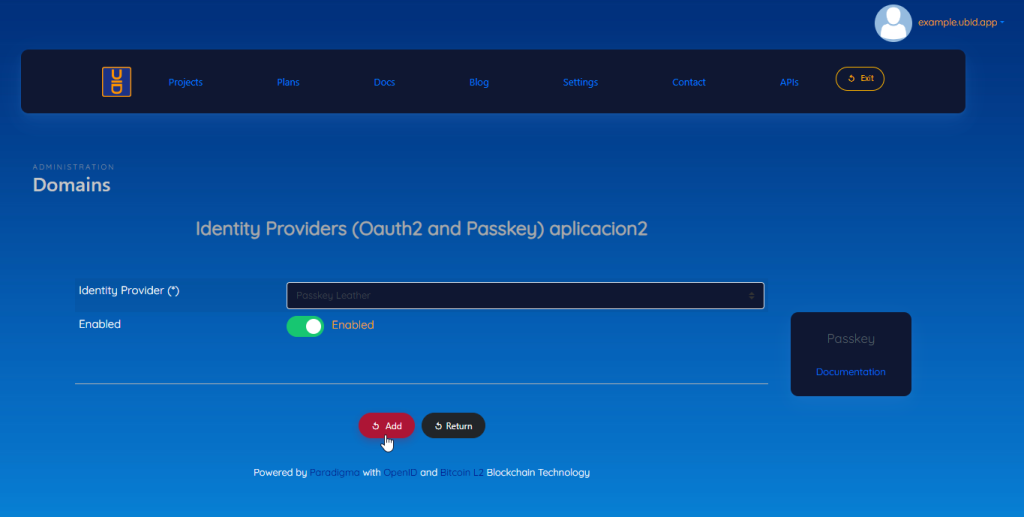
This takes us to a screen that allows us to enable or disable the passkey, as shown below:
3.5 Extra configuration for our application
To customize the login of our new application, you just have to click on the “Settings” button, as shown in the following image.
We have access to three extra configurations, which are:
- Enable/Disable new user registration
- Locate the login on the left, center, or right of the screen
- Customize the initial login mode in light or dark.

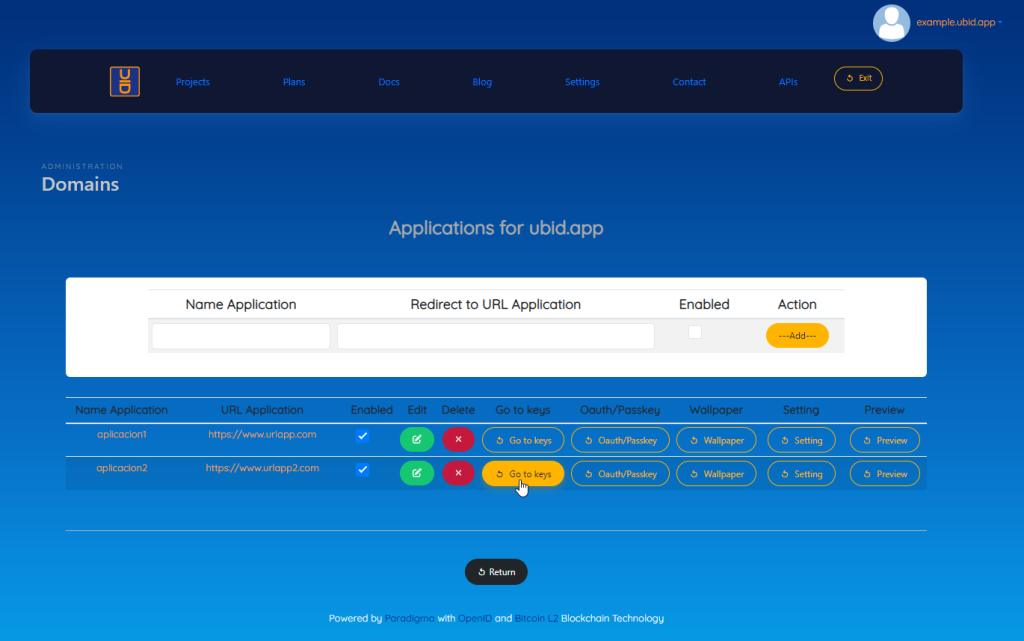
3.6 Create encrypted keys to access the login from a client application
To create the encrypted keys that allow access to the login from a client application, you must click on the “Go to keys” button, as shown in the following image.
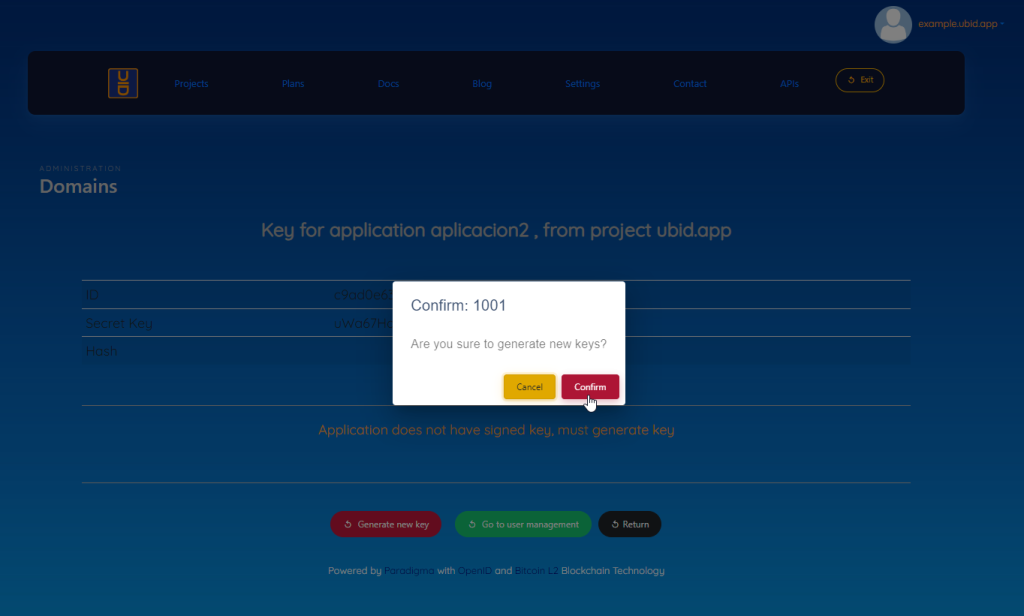
Initially the new application does not have an encrypted key. To generate a key you must press the “Generate new key” button
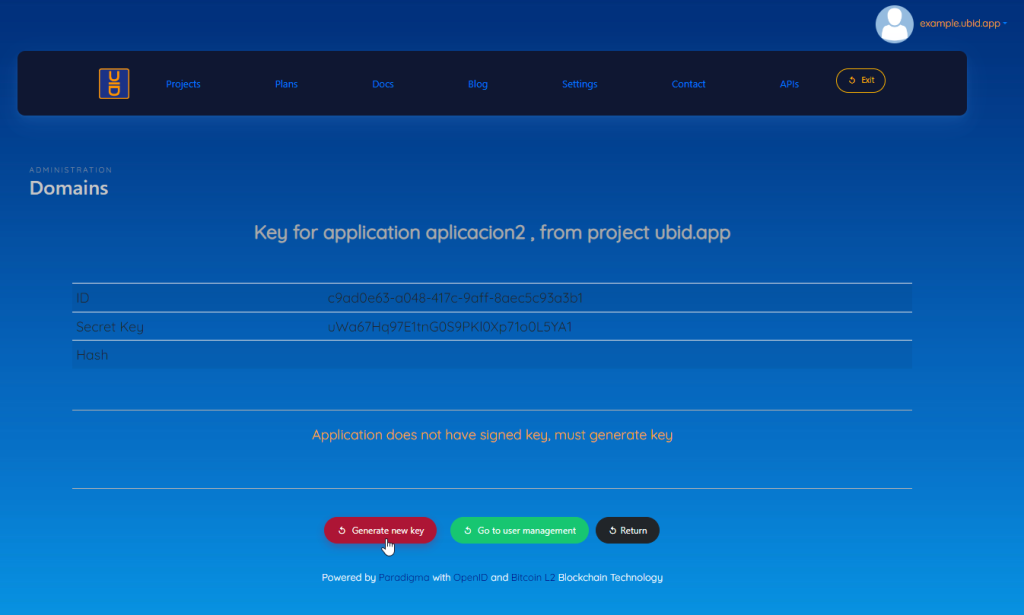
The system will request confirmation, to generate you must press the “Confirm” button.
To go back without generating a key you must press the “Cancel” button
The system will request that you connect to the application wallet, as indicated in the following image:
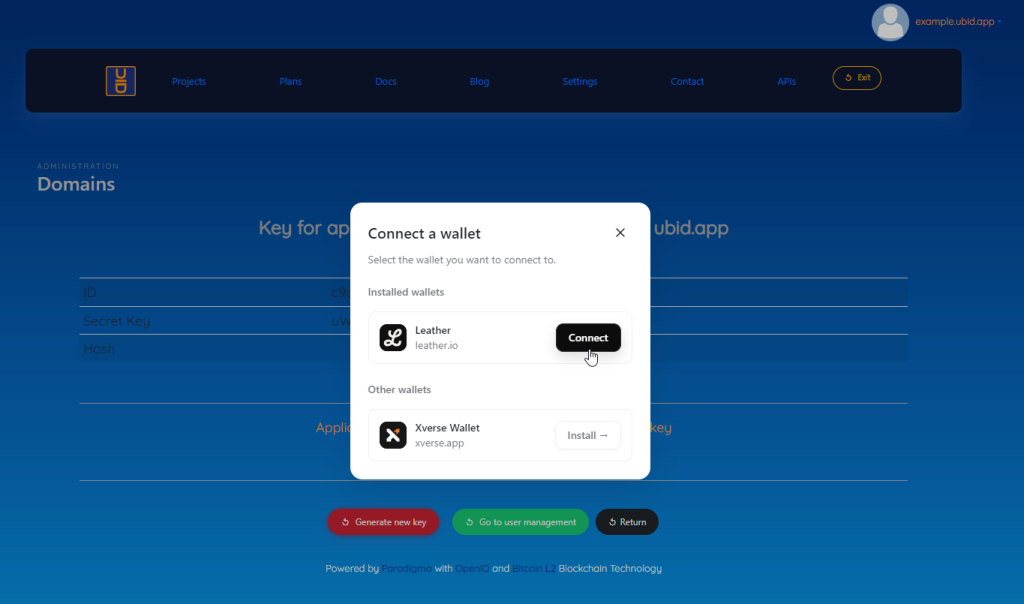
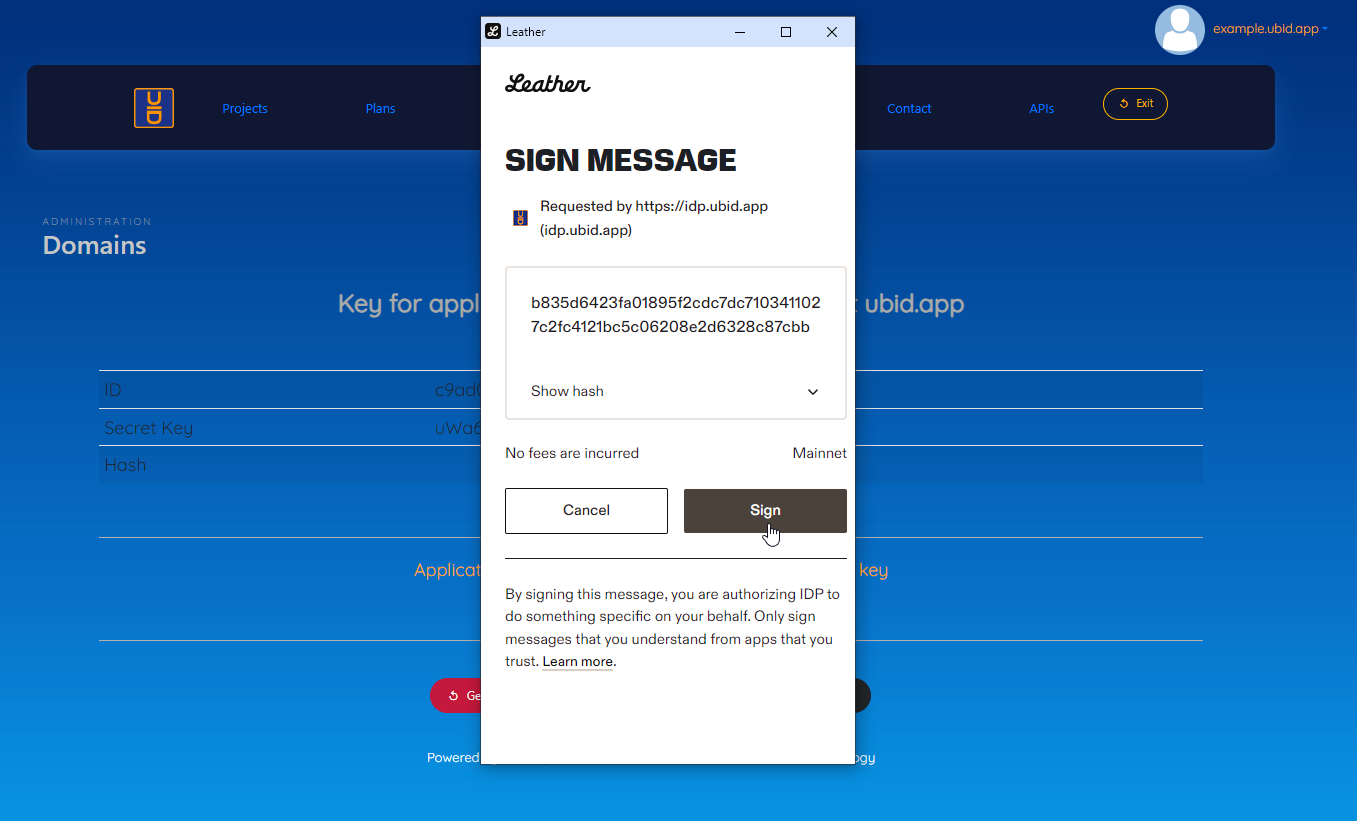
You must select your user ID

You must select your user ID, and click on the “Sign” button, to sign the key.
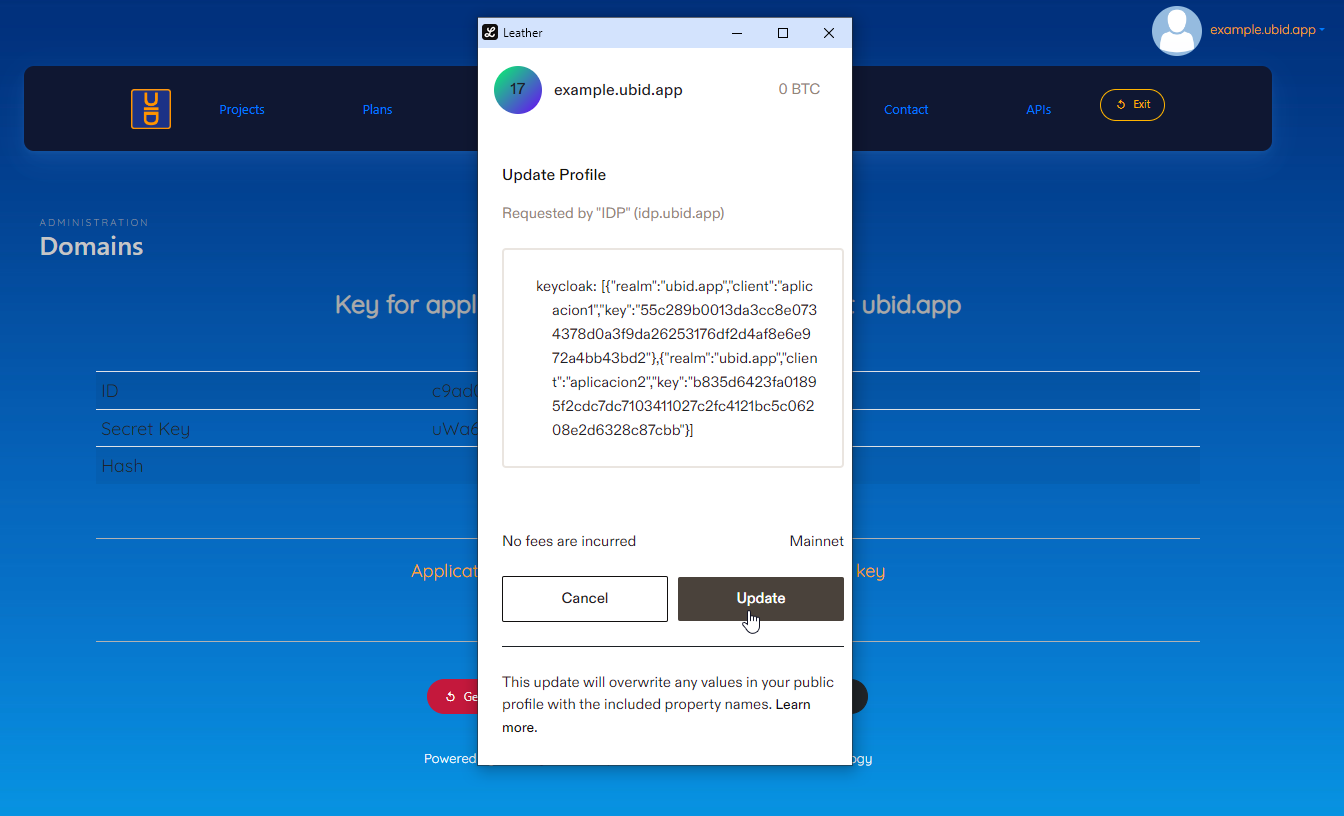
To finish, you must add the key to the application profile by pressing the “Update” button
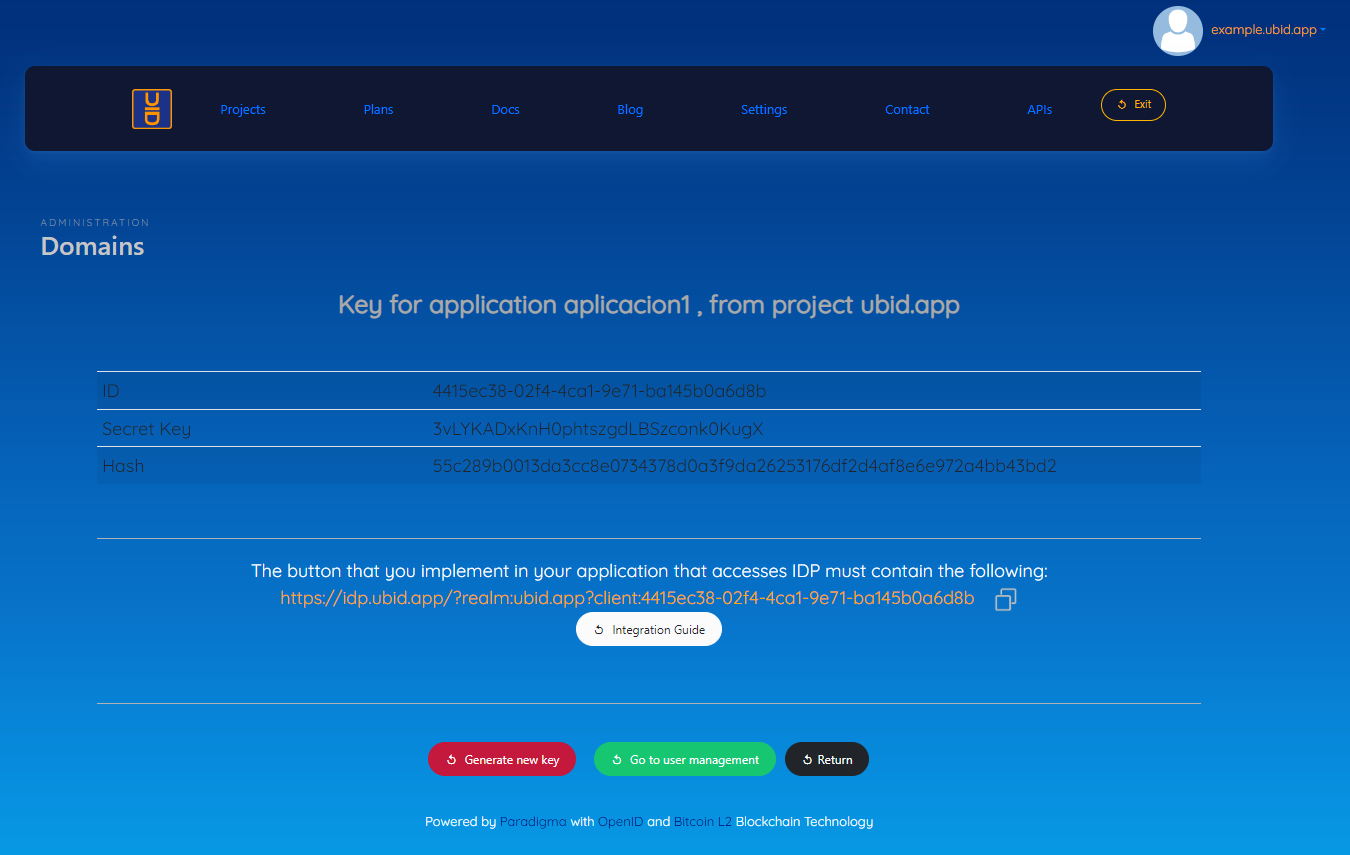
The system will tell us which endpoint should be used in your client application to access the application login.
3.7 Preview the application login
The system allows us to preview the application login and how the end user will see it.


4. Communication channels
The official communication channels are Discord https://discord.gg/6JfpFjadA2, and the email support@paradigma.cl